
Stuffed Grape-leaves

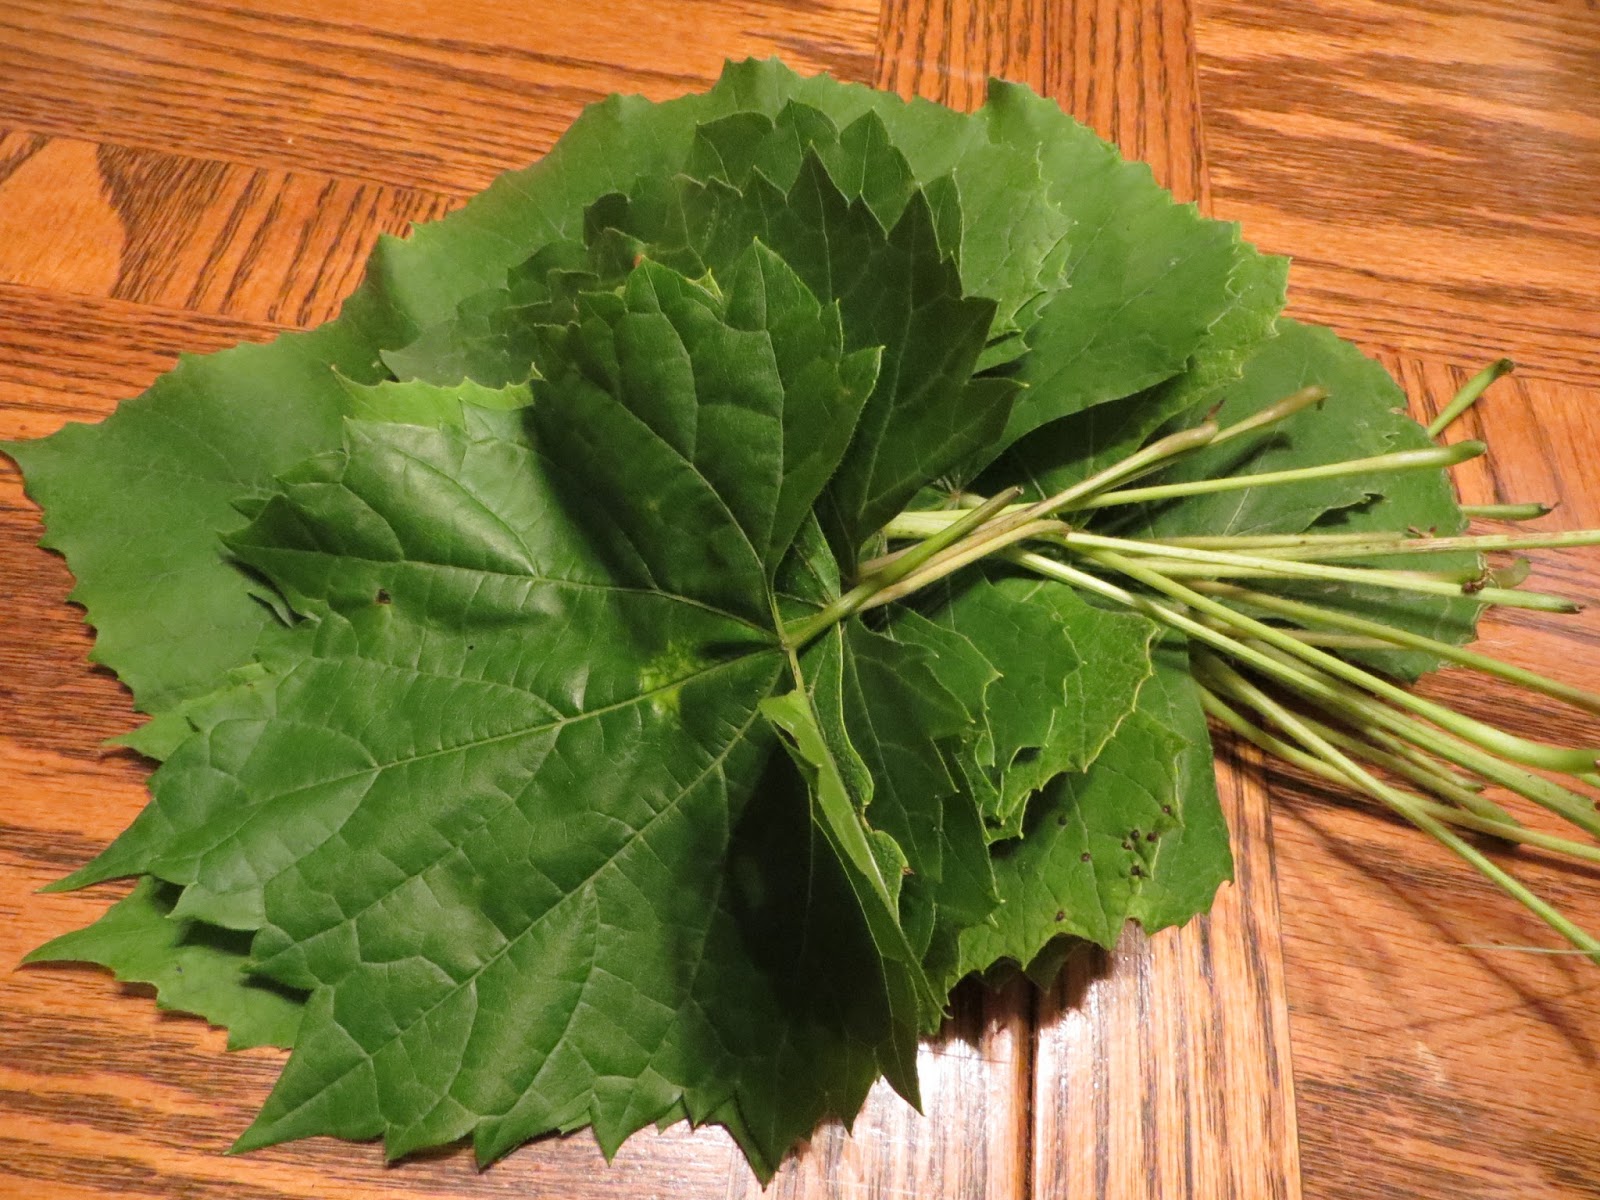
Yum! Stuffed grape leaves! But they're only good before the leaves get tough from sun exposure or before they get " too old", like in July or later. To find the best grape leaves, look under the plants and preferably in the shadows or areas where the sun doesn't reach much. The easiest grape leaves for wrapping are the ones with the longer stems, but that can pose a problem as the longer stemmed ones are often the not so tender ones.

To make the stuffed grape leaves, I picked a number of tender leaves, rinsed them well in water and then soaked them for 30 minutes (to further soften them) while I was whipping up the "stuffing".


The "stuffing" is quite simple:

1 small onion finely diced
1 medium-large tomato, diced (removing skin is optional)
5-6 garlic cloves, minced
2-3 cup brown rice (takes longer to cook but has richer flavor - 
the brown rice cooks faster if allowed to marinate in the other flavors for 30 min or so)
2 T. fresh lemon juice
small amount of lemon zest (optional)
salt and black pepper to taste


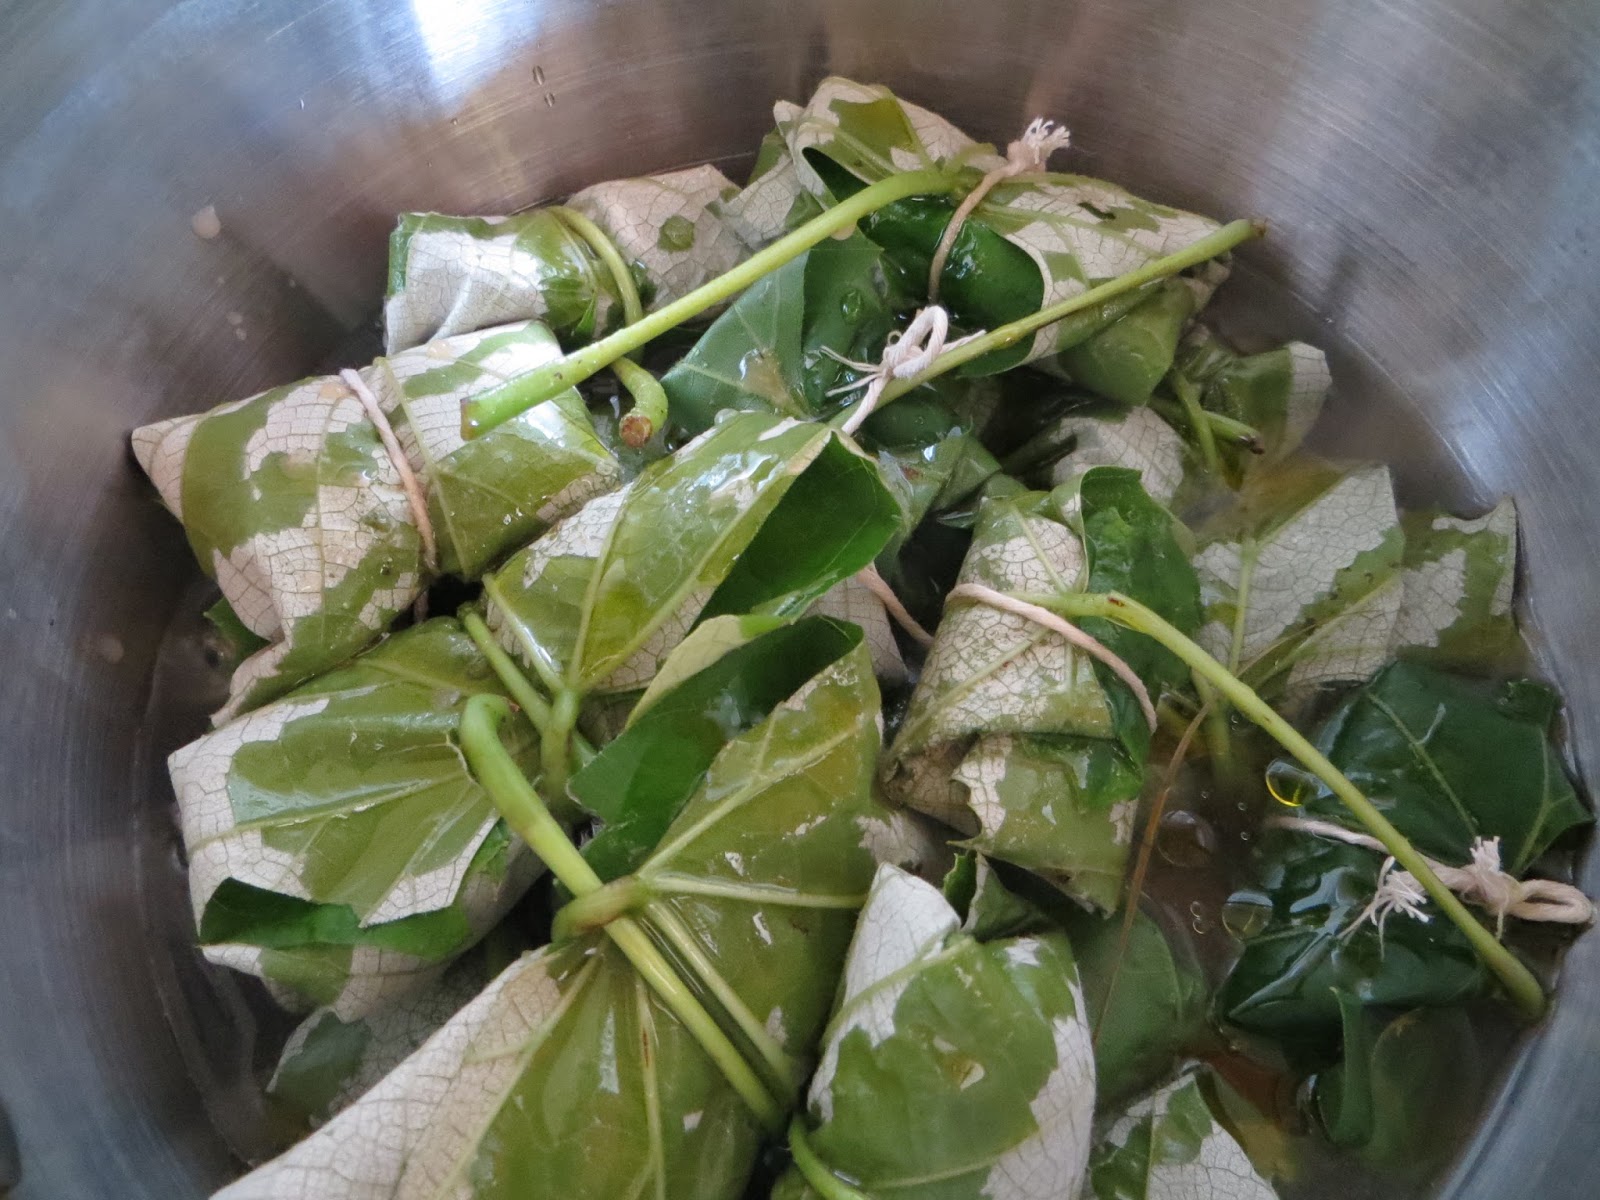
Put 1-2 tablespoons on each grape leave and tuck the leaves around, to finally wrap the long stem around the outside "package" and hopefully tuck the stem end under the stem on the other side to lock it in place. The grape leaves will unwrap if not secured, so I have also used thread or a clean string (as can be seen in the final picture).


Once the grape leaves are all stuffed and securely tied, pour water over them to cover and then liberally pour on olive oil. Turn on low heat and allow to simmer-cook, approximately 50 minutes (brown rice takes longer to cook). Watch the pot and add water if necessary to keep the leaves from scorching.


Place on a serving dish and serve. Removing the tough stem and certainly the string before serving might be a good aesthetic choice.

Comments

Popular posts from this blog

Fingernail Analysis, part III

8 Health Warnings Your Fingernails May Be Sending   Source Your eyes may be the window to your soul, but, in many ways your, nails are the window to what’s going on inside your body. Here are some common nail problems and what they mean:  Take a good look at your fingernails and you may notice subtle variations in the texture or color; white spots, a rosy tinge, rippling or bumps in the surface to mention a few. These imperfections may not look like much to you, but it’s more important than you might think to maintain healthy fingernails. That’s because to the trained eye, nails can provide valuable indications about your overall health.  Hold a hand level with your nose about a foot out from your face and scrutinize each one. Look at the grooves, curves, ridges and dips. Notice how thick or thin they are and if there are any stark differences. Are your nails are chipped or broken. Make a note of the color of the nail itself, the skin under it as well as t...

80% Alkaline + 20% Acid = Balance

The Rule of 80/20: The body needs a balance of alkaline-forming and acid-forming natural vegetarian food. The following rule has evolved as a consequence of many years of research and clinical findings vis-a-vis the use of nutrition to heal disease. To replenish and sustain your proper alkaline and acid reserves, eat 80% of your foods from the alkaline-forming list and 20% from the acid-forming list. The following is an outline of the major vegetarian food groups and their chemical reaction tendencies in the body. All of the food items should be raw and organically grown (this collection of data from Hippocrates Health Institute). source ALKALINE-FORMING sprouts of small seeds, beans and most grains leafy and root vegetables vine-ripened fruits/vegetables (cucumbers, squash, tomatoes, bell peppers, etc) sea vegetables (dulse, nori, wakame) fresh food herbs cayenne pepper garlic and onions tree-ripened fruits small grains (amaranth, millet, quinoa, teff, etc) ...

Gluten-free Cream Puff Pastries

adapted from Chocolate Profiteroles in Desserts: Mouthwatering Recipes for Delectable Dishes (1997) Cream Puff Pastry 1/2 cup quinoa flour 1/4 cup white rice flour 1/4 teaspoon sea salt pinch of cardamom 6 tablespoons coconut oil 3 eggs 3/4 cup water 1. preheat over to 350F 2. Sift dry ingredients together 3. In medium saucepan, bring coconut oil and water to a boil. Remove from heat and add in dry ingredients. Beat for 1 minutes until mixture starts to pull away from the pan. Put over low heat and cook mixture together for 2 minutes, beating constantly. Remove from heat. 4. Beat one egg in a small bowl and set aside. Add remaining eggs, one at a time, to the mixture. Mix well then add beaten egg gradually. Dough should be smooth and shiny and fall by spoonfuls on a greased cookie sheet. 5. Drop by tablespoons (x12) on a sprayed cookie sheet, well spaced. Bake 25-30 minutes until pastry has risen and browned. 6. Turn off oven and let puff. Cool with door cracked. [Oops! I opened t...